Showing posts with label recipes. Show all posts

Wednesday, June 10, 2009

Vegan soy-free omelets


Ever since I saw this blog post, I've wanted to try it out. Last night we did just that. It turns out to be amazingly easy, and amazingly tasty. The essential recipe is equal parts chickpea flour (besan) and water, salt to taste and a dash of turmeric for color. I recommend cooking them in non-stick if you have it. I made mine in my cast iron skillet and they stuck even though I used a generous amount of oil. I also found that I could skip flipping them, which only broke them apart completely, because the undercooked batter was just as tasty and lent a bit of authenticity to the "omelet". Instead I cooked them until mostly set, added fillings (or not, plain is just as good), and rolled each edge over into the center and flip onto a plate. The taste sort of reminds me of the eggs laid by the corn-fed ducks we raised when I was growing up. And surprisingly my favorite condiment on the omelet is piccalilli relish which seems to be the best combination of sweet and tart to compliment the earthy omelets.

Thursday, April 23, 2009

Spinach and Leek Quiche


This recipe is very loosely based on Bryanna's Vegan Bell Pepper and Mushroom Quiche. Obviously one difference is the vegetables, but I also substituted EnerG egg replacer for the cornstarch and agar, as well as increased the tofu and vegan parmesan and decreased the soymilk. I did try Bryanna's recipe as written, but I found that the blended mixture sat on top of the vegetables and was a little too pudding-like for my taste. I also lowered the temperature to allow the filling time to become dense before the outer surface forms a crust. The changes I made produce a pie that is closer in consistency to the quiches I remember from my pre-vegan days.

ingredients:
1 9" pie shell
1 Tbs olive oil
1 leek, cleaned and sliced thinly
1 lb frozen chopped spinach
2 Tbs EnerG egg Replacer powder
1-1/4 cup soymilk
1 tsp vegetarian chicken bouillon (amount needed to make 1 cup broth)
1 dash of turmeric
1 dash nutmeg
a pinch of salt and pepper
1 cup firm tofu
1/2 cup Galaxy Foods Vegan Soy Parmesan
a dash of paprika

1. Bake the pie shell at the temperature indicated for a no-bake pie filling. Err on the side of undercooked. My pie crusts called for 425 F for 11-16 minutes, so I baked mine at 425 F for 10 mins. Once the shell is baked, cool completely and set the oven to 350 F.

2. Sweat the leeks in the olive oil until translucent (I used a covered cast-iron skillet).

3. Add spinach to the softened leeks and stir uncovered until most of the moisture is gone and the spinach is almost dry. Patience and a med-low heat are needed here.

4. Once the spinach is almost dry, remove from the heat and let the mixture cool while you blend the rest of the ingredients.

5. Add the EnerG powder to a medium-sized bowl, and slowly whisk in the soymilk until it is a smooth but thick liquid. Whisk in the bouillon (pulverize with a fork first if you're using a cube instead of a powder or paste), turmeric, nutmeg, salt, and pepper. Use enough turmeric to give the mixture a nice egg-y color.

6. Whir the tofu in a food processor or blender before adding the EnerG-soymilk mixture and blending the entire thing a few seconds until smooth.

7. Stir together the blended mixture, the soy parmesan, and the cooled spinach mixture before filling the cooled pie shell.

8. Smooth the top of the unbaked quiche with a spoon or spatula and lightly sprinkle with paprika before baking in a 350 F preheated oven for 45 minutes, or until the filling is firm and has started to crack.

Sunday, April 27, 2008

Auntie X's No-Knead Bread

Every weekend I make a batch of No-Knead Bread, sometimes I make extra dough and freeze it for later. I really love the flavor and texture that the long, slow rise gives the bread. My recipe is based on the NY Times recipe with a few changes.

ingredients:
1-1/2 cups whole wheat flour
1-1/2 cups all-purpose flour
1/4 to 1/2 teaspoon instant dry yeast (I just eyeball it in the palm of my hand)
1 to 2 teaspoons raw/turbinado sugar (eyeballed)
1 to 2 teaspoons salt (again, I just eyeball it)
1-5/8 cups warm tapwater

1. In a big bowl mix all the ingredients together with a wooden spoon until all the flour is wet, don't stress over having everything incorporated because the long rise will cover a multitude of sins.

2. Cover the bowl tightly with plastic wrap, and let sit on top of the fridge or in some other warm, draft-free place for 12 to 18 hours.

3. About a half hour before you're ready to bake the bread pre-heat the oven as hot as it will go: 500 F if yours will allow, mine tops out at 450 F. Liberally flour your countertop, much more heavily than you would for other breads or cookies... if you see any spots of countertop the dough will stick. Basically the dough is a very wet dough. Dump the dough out onto the floured surface and scrape the bowl with a rubber spatula. Don't try to knead the dough, just fold it into thirds from both directions, flour the top, then cover with the plastic wrap off the bowl, and let rest for 30 minutes.

While your dough is resting, prep your loaf pan. First I take a large piece of aluminum foil, about twice as long as the loaf pan or longer:


Place the loaf pan in the middle of the piece of foil and first fold up the long edges against the outside of the loaf pan:


Then squeeze the ends together at each end of the loaf pan:


Then lift the short end of the foil up against the ends of the loaf pan and crimp to secure:


Now take the loaf pan out of the foil, and presto, you have a perfect mirror image that will keep the steam in, allowing the bread to rise to its maximum height before crusting.


I use Earth Balance or Soy Garden to lightly grease the loaf pan:


Once the dough has rested for 30 minutes, drop it into the loaf pan, it doesn't much matter how un-gracefully you do this, because it pretty much evens out in the oven.


Next, cover the loaf pan with the tinfoil tent and squeeze the edges tightly to the pan for as close a seal as possible:


Next pop the loaf into the pre-heated oven and bake for 30 minutes. After 30 minutes, use tongs to remove the aluminum foil and bake another 20 minutes to brown the crust.


The beauty of this recipe is that it is so forgiving.

Sunday, April 20, 2008

Spring-Thyme Linguine for one


We've had a few really warm days, and the nights have stayed above freezing for most of them, so Paul and I decided to take full advantage of this beautiful sunny weather. Yesterday we took a picnic dinner out to the local state forest and hiked a bit. Today while Paul has been at work, I've been raking away the protective winter mulch and death to reveal the new buds of spring. The thyme in the herb garden is doing so well, you'd hardly think that winter had happened. Consequently, this lunch was born.

Ingredients:

1 generous serving of linguine, cooked but still damp with cooking liquid to prevent sticking
1 T olive oil
3 large porcini mushrooms, sliced
6 small spring onions, greens chopped into larger pieces, whites sliced finely
1 clove garlic, minced if you don't own a garlic press (though every garlic-lover should!)
1 small splash of white wine or rice wine vinegar
1-2 T fresh spring thyme, leaves slid off the stem
salt and pepper to taste

For this recipe I used my well-seasoned cast iron skillet.
Add the olive oil and mushrooms to the skillet and toss vigorously over high heat so that all of the liquid escaping the mushrooms evaporates. Stir-fry until the mushrooms have lost most of their water and started to brown, but haven't yet reached the crispy stage.
Reduce heat to med-low and add the green onions, toss until the whites of the onions have softened. Squeeze in garlic clove and continue stiffing for about a minute. Add linguine and white wine and toss. Turn off heat and add fresh thyme, salt and pepper to taste.

Bon Appetite!

Monday, March 10, 2008

Wild Rice and Artichoke Salad


This is the recipe that originally made me realize that I didn't hate wild rice, artichokes, or capers like I thought I did. Wild rice always smelled swampy to me, and my few attempts at artichokes had left me un-enamored. This recipe seems to bring together these ingredients in such a way that lets them really shine. The original recipe was more involved and called for fresh artichokes, but generally that just seems too time consuming. By using canned artichoke hearts in this recipe, all of the ingredients except for the parsley and red onion are shelf stable, so this can be a quick and easy pantry meal.

ingredients:

3/4 cup uncooked wild rice
1/2 tsp salt
2 bay leaves
1 can artichoke hearts
1/2 red onion, very thinly sliced

dressing:
1/4 c veg broth
2 T lemon juice
1 T apple cider vinegar
1 clove garlic
1 tsp dried oregano
1/4 tsp salt
several grinds of black pepper
3 T of your good olive oil
2 T capers, minced

finally:
1 generous bunch of fresh parsley, minced

Wash your wild rice by rubbing between your fingers in a bowl of water, strain and rinse in a fine mesh strainer. Cook the wild rice with the 2 bay leaves and 1/2 tsp salt in about 1-3/4 to 2 c water. If there is water leftover after almost all the grains have split and popped, then drain off the rest of the liquid and remove the bay leaves.

While the wild rice is cooking, chop the onion thinly, and quarter the artichoke hearts lengthwise. Once the wild rice is finished cooking put it in a large bowl to cool. I usually add the onion at this point, since the heat of the rice partially cooks them and takes the edge off their bite. If you really like raw onion, feel free to keep them aside until the wild rice is cooled.

Next mix up the dressing. I find the easiest way to do this is to measure the ingredients for the dressing into a small tightly sealing container and shake. Once the dressing is emulsified, you can combine everything. Don't forget to add lots of fresh parsley, as much as you can stand, it really brightens it. I think this salad is best at room temperature because the flavors are dulled too much by cold. It's okay to prep ahead and refrigerate though, just give it a chance to come up to room temperature before serving.

Monday, February 18, 2008

Rice Noodle Stirfry


I haven't posted much in the last week because I've been feeling rather nauseous. For you nosey gossips: no, I'm not pregnant, and yes, I'm sure. I think it must have been a stomach bug and all I've wanted to eat is starchy things. Tonight is the first night since V-Day that I've felt like cooking, and I wasn't really feeling terribly adventurous. I wanted comfort food. I mentioned before that I grew up on PBS cooking shows including Yan Can Cook! My first ever kitchen implement was a wok set and I made lots and lots of stirfries. I could live on stirfries alone if Paul were game for it. Luckily for him I've branched out a bit since then.

This is my standard stirfry with rice noodles. I don't claim it to be authentically ethnic in any way, in fact I'm pretty sure that it's authentic in absolutely no way. I like my stirfries to be on the dry side. I'm not a big fan of brothy sauces on stirfries, even sauces that are thickened with starch, so expect none of that.

In this recipe I fry the tofu. I know that I've talked about not needing all the oil in the Veganomicon recipes, so you might have gotten the idea that I take after the Fat Free Vegan herself. Well, that's just not the case. It's not that I have anything against using fat in cooking, I just like to make it count. Unless you're the sort of person who is always trying to gain weight (which I'm not) I think that fat should have a significant impact on the flavor or texture of whatever you're using it in, or else it's just meaningless calories, and I have no need for meaningless calories. I don't fry every day, in fact it's less than once a month, so I think it's reasonable to splurge.

ingredients:
enough oil for frying
1 lb firm/extra-firm tofu
4 servings of a pad thai style rice noodle
2 leeks (white parts only, or 1 leek if using both the white and green parts), sliced thinly
2 small carrots, sliced diagonally
1 red bell pepper, sliced into strips
1 package baby broccoli, sliced on the diagonal
1 tsp thai green curry paste
1 tsp pureed ginger
1-2 clove garlic, pressed, smashed, or minced
2 Tbs seasoned rice vinegar/sushi vinegar
Bragg's liquid aminos or soy sauce (to taste)
1 tsp toasted sesame oil

Drain the tofu and press it between two plates weighted with something heavy while you go prep everything else to squeeze out as much liquid as possible. Once the veggies are chopped, come back to the tofu and drain off the extra liquid. Slice the tofu into 1/2 inch cubes and pat them all as dry as possible.

Go put on your rattiest long sleeved shirt and fill your wok with about 2 inches of oil. Heat it until you get tiny bubbles when you insert a bamboo chopstick. Fry the tofu cubes in very small batches. I like to use a long-handled slotted spoon to gently stir the tofu cubes in the oil to get all 6 sides as evenly as possible until they are light golden brown and then drain on paper towels or a cooling rack.

Once all of the tofu cubes as toasty and golden, drain off all the used oil into a heat-safe container and wipe out any burnt-on bits.

While the wok cools off a bit from the frying, break the rice noodles up into a lidded, heat-safe bowl, and boil enough water to cover the noodles. I like to use my electric kettle for this because you are just steeping the noodles rather than boiling them like you would wheat noodles. This way they cook gently enough that they don't turn to mush in the pot or dry into clumps in the strainer while you're trying to get your veggies just right in the wok. Once the water boils, pour over the rice noodles, give them a quick stir, to make sure they're all submerged, cover and let sit while you stirfry in your wok.

Now, the rest of this goes together quickly (less tan 10 minutes), despite my lengthy description. In the wok, add back the tiniest bit of oil to stirfry the veggies, really if the wok is hot you only need a tsp or less. The wok should already be pretty hot from the frying, if not let it warm up on high/med-high heat. Into the hot wok, add the sliced leeks and toss until they are shiny and starting to go limp, then quickly add the sliced carrots. This should go fairly quickly, just adding the next vegetable once the previous veggie has made a couple laps in the wok and has started to go shiny from the oil. Next is the bell pepper, and then the baby broccoli.

Once all the veggies are in the wok, I like to give it a toss, turn the heat down to medium and cover with a lid for a brief steam. I check it after just a minute, give it a toss, the veggies should still be a bit undercooked so that they can finish when you add the noodles.

Next, move the veggies up the sides of the wok to leave a space in the bottom center to make the sauce. Add the curry paste, ginger, garlic, and rice vinegar and stir together vigorously until the curry is dissolved in the liquid before stirring the veggies back into the center and adding the fried tofu cubes. The liquid will evaporate very quickly if your wok is hot, so work fast.

Now it's time to drain the noodles and add them into the wok. Don't worry too much about excess liquid because it'll help keep the noodles from sticking to the wok. Now it's time to add the Bragg's / soysauce slowly while stirring the noodles, tofu, and veggies to make sure that everything is seasoned evenly. This is where it's important to taste. Once your stirfry is seasoned to your taste, stir in a splash of sesame oil to finish, and serve immediately before everything goes limp and the noodles start sticking.

Sunday, January 20, 2008

Perfect Pumpkin Bread


Recently I baked and pureed a large pumpkin leftover from Halloween. I searched the interwebs for the perfect pumpkin bread recipe. Far too many called for too much sugar, oil or eggs. I've made some revisions to this basic vegan recipe. The original had far too little spice for my taste, so I've increased the cinnamon and added fresh ginger. I would expect that dried ginger or even crystalized ginger would make a lovely addition. I've also added chopped almonds for a pleasing crunch. Almonds are my favorite nut, and I think they add a cleaner, fresher taste than walnuts or pecans could. The dried cranberries add a juicy tang, though if you have only traditional raisins, I think some orange or lemon zest would give it that zing. I baked the pumpkin halves cut-side down on a sheet pan for 90 minutes, pureed the pulp in the food processor, and drained over night in a cloth lined sieve to reduce the water content.

dry ingredients:
2 cups white whole wheat flour
2 tsp baking powder
1 tsp baking soda
1 tsp cinnamon
1/4 to 1/3 tsp ground cloves
a generous pinch of salt

wet ingredients:
2 cups cooked pumpkin puree
1/2 cup agave syrup
2 T oil
1 tsp vanilla extract
1/2 tsp fresh ginger puree
1/2 cup roughly chopped almonds
1/2 cup dried cranberries

Preheat oven to 350 degrees and grease a standard size loaf pan.

Combine dry ingredients in one bowl and wet ingredients in another. Fold wet ingredients into the dry until thoroughly incorporated. The batter should be fairly stiff. Smooth batter into the greased loaf pan and bake immediately for 55 minutes. Remove from pan and cool completely on a rack before cutting.

Monday, July 30, 2007

Auntie X's Avocado Wraps


This light, fresh wrap of sweet summer tomatoes and creamy avocado is a satisfying summer lunch. The key ingredient is the Mango Chili vinegar from Trader Joe's that is bright and fruity with just a touch of chili heat.

Makes 4 moderately sized wraps.

ingredients
3 plum tomatoes diced (about 2 cups)
3 scallions (both white and green) thinly sliced
1 avocado diced
2-4 tsp fresh or frozen cilantro (optional)
2 Tbs Trader Joe's Mango Chili vinegar
salt and freshly ground pepper to taste
4 whole wheat flour tortillas

Combine tomato, scallion, and avocado in a bowl. Mix cilantro and Mango Chili vinegar in a small bowl and add to the vegetables mixing thoroughly. Season with salt and pepper, scoop filling into the center of each tortilla and fold burrito-style.

Made as 4 wraps, each serving has approximately 175 Cal, 7 g Fat (1 g Sat, 1 g Poly, 4 g Mono), 31 g Carbs, 5 g Fiber, 5 g Protein

3 WW POINTs

Friday, January 12, 2007

Lexy's Lunch Salad


mess o' spring greens (I like the herb salad mixes)
2 mushrooms, sliced
handful of snowpeas, ends removed and cut into bite-sized pieces
2 mini sweet peppers, sliced into strips
1/2 c chickpeas mashed with a fork

dressing
1 clove garlic pressed, squeezed, or smashed
1/2 tsp dijon mustard
2-3 T balsamic vinegar
1-2 tsp virgin olive oil

I arrange the veggies on the plate, top with the mashed chickpeas, shake the dressing in an empty jar and drizzle.

I love the way that the smashed chickpeas soak up the dressing and don't roll off the fork. If you use a regular salad mix, you can add some chopped parsley and/or basil. I love the way that fresh herbs brighten the flavor of every bite so much more than dried herbs in a premixed dressing. The dijon mustard makes the dressing creamy and a good balsamic vinegar is so sweet you may not even need oil.

Sunday, December 24, 2006

toaster oven blueberry muffins

As I've mentioned before, I'm without a proper kitchen for the time being while my house is under renovation. My cooking is limited to a hotplate, electric kettle, crockpot, microwave, and our most recent addition, which I can't believe I ever lived without, the toaster oven. The toaster oven has been wonderful. We got a model that has a bowed front and back allowing it to accommodate round things like pies and pizza, and we've also used it to bake scones and cupcakes, and even baked teriyaki tofu sticks (addictive). The only drawback is that I need to cut recipes down to what will fit in the oven, so for cupcakes, cookies and such it's what fits on the tiny baking sheet that came with it or a 6-well muffin tin.

This weekend I was looking for options for breakfast foods for special occasions. Our usual special occasion breakfast of scrambled tofu with soysage and English muffins has gotten a little tired, and I wanted something new. I decided I wanted to make blueberry muffins but I had to cut the recipe in half to make it fit. I suppose an alternative would be to mix the dry ingredients and wet ingredients separately and then stick half of each in containers in the fridge/freezer for another time, but I decided to just go ahead and make the smaller batch. The full recipe is at the bottom.

Blueberry Muffuns - a muffin that errs on the side of sweet :)

dry ingredients

1 c all-purpose flour
3 T sugar
1 tsp baking powder
1/4 tsp baking soda
1/8 tsp salt

wet ingredients

2 T +2 tsp oil (canola or other light flavored oil)
3/8 c (equivalent to 1/4 c + 2 T) soy creamer (or soy milk)
1/2 a 6 oz container of vanilla soy yogurt

additions
1/2 c frozen blueberries (or other fruit)

Makes 6 muffins.
Set the toaster oven to 400 F and preheat while you mix batter.

Combine the dry ingredients in a medium sized mixing bowl and create a well in the center. Add the wet ingredients and fold to combine, add the blueberries and immediately pour into a paper or foil lined muffin pan and bake for 18-22 minutes.

If you have access to a full-sized oven the doubled recipe (makes 12 muffins) is much easier to measure, the instructions are the same, but the ingredients are as follows:

dry ingredients

2 c all-purpose flour
1/3 c sugar
2 tsp baking powder
1/2 tsp baking soda
1/4 tsp salt

wet ingredients

1/3 c oil (canola or other light flavored oil)
3/4 c soy creamer (or soy milk)
6 oz container of vanilla soy yogurt

additions
1 c frozen blueberries (or other fruit)

Thursday, September 14, 2006

bulgur, red pepper, and cannellini salad

1 cup dry bulgur
2 cups vegetable stock
1 can cannellini/white beans
1 red bell pepper chopped
1 small bunch parsley, chopped
1 clove garlic, pressed
1 tsp cumin
1-2 T extra virgin olive oil
2-3 T lemon juice (to taste)

Cook the bulgur in the vegetable stock. Once cooked, cool to room temperature and add the rest of the ingredients and season to taste.

chickpea salad sandwiches

Chickpea salad is a vegan take on the old standby of tuna salad. When you mash chickpeas with a fork, the texture is quite similar, and if you're like me and enjoy the supporting flavors more than the fish itself, this meal is just as good. If you want that fishy taste, you can experiment with different types of sea vegetables and find one you like.

canned chickpeas, well rinsed or cooked chickpeas
vegenaise, nayonaise, or another vegan mayo
celery, copped finely
onion, or scallion, chopped finely
anything else you feel like adding. I know some people like capers, I like sweet pickle relish, because that's how my mom used to make it :)

The most important step is to mash the chickpeas. I like to use the tines of a fork, but you could also use a potato masher. Then add the supporting cast, until you get the mix that you like. This is really best served with lettuce and tomatoes in a wrap or pita in my opinion.

Thursday, August 31, 2006

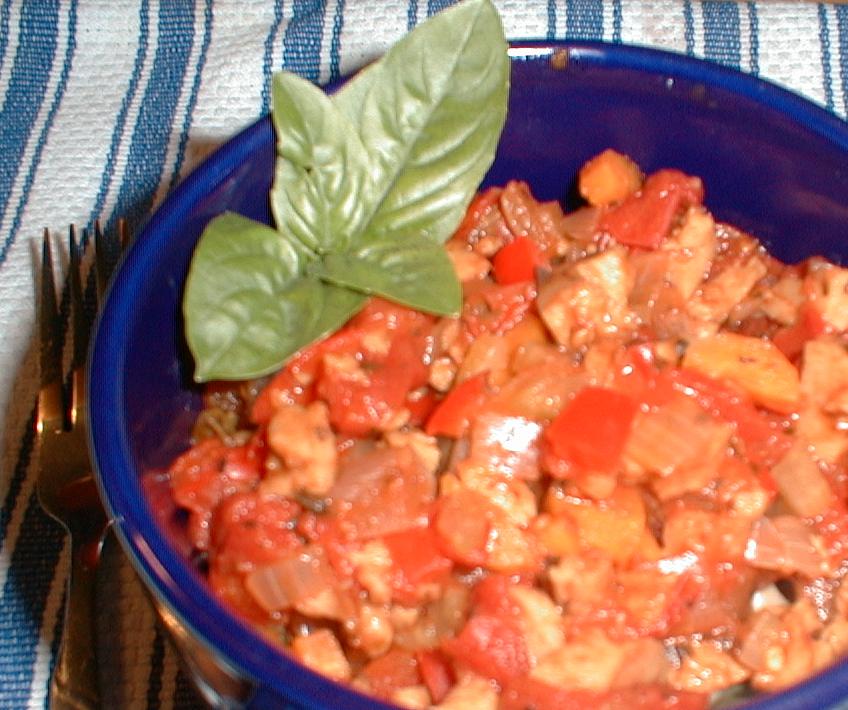
Seitan Cacciatore


1 lb seitan, chopped
2 carrots, chopped
2 stalks celery, chopped
1 red bell pepper, chopped
1/4 c white wine
1 28 oz can tomatoes, chopped
1 bay leaf
1 T oregano
1 T basil
hot pepper flakes to taste


Saute carrots, celerry, onion, and bell pepper in olive oil until onion becomes translucent. Add seitan and saute until seitan browns. Deglaze pan with the white wine and add the tomatoes, pepper flakes, and herbs. Simmer over medium heat stirring occasionally, and serve over whole wheat pasta.

Sunday, August 27, 2006

Lentil and Orzo soup


1 onion, chopped
1 carrot, chopped
1 stalk celery, chopped
1 c lentils
4 c vegetable stock
4 c water
1 bay leaf
1 sprig fresh rosemary
1 T fresh thyme
1/2 c tomato sauce or diced tomato
1/2 c whole wheat orzo
1 T fresh basil
1 c spinach or other leafy green


Saute onion, carrot, and celery in a small amount of olive oil until onion starts to turn translucent. Add lentils and saute for another 1-3 minutes. Add vegetable stock, 4 cups of water, bay leaf, rosemary, thyme, and tomato and bring to a slight boil. Add orzo and simmer for 6-8 minutes before adding spinach and basil and continue cooking until orzo is al dente. Remove the bay leaf and rosemary before serving.

Wednesday, August 16, 2006

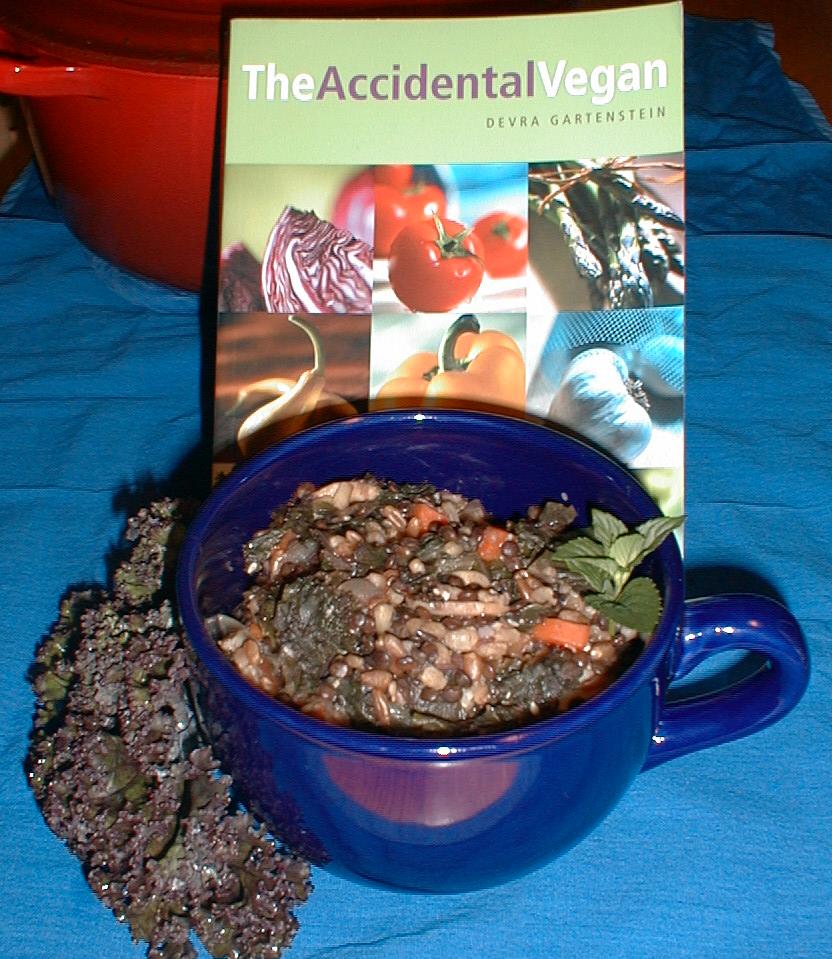
Kashi Kedgeree


1 c kashi 7 grain pilaf (dry)
2 c broth
1 c french lentils
2 c water
2 T olive oil
3 cloves garlic, minced
1 onion, chopped
3 carrots, chopped
10 oz mushrooms
1 bunch purple kale, chopped
1 tsp ground cumin
1 tsp ground coriander
2 T lemon juice
Bragg liquid aminos to taste


Cook the pilaf in the broth acording to package directions. Cook the lentils in water until tender and then drain. Sautee the garlic, onion, and carrot in 2 T olive oil over medium heat until onion is starting to color. Add the mushrooms, cumin, and coriander to the onion, garlic, and carrots, and stir to combine. Add Kale to the other vegetables and cover to steam for a couple of minutes, making sure nothing burns or sticks. Once kale is wilted, add pilaf, lentils, and lemon juice and stir to combine. For an extra kick squeeze a clove of garlic in a garlic press over the pot. Adjust your seasonings with a splash or two of Bragg's.


This recipe was inspired by Devra Gartenstein's Kegeree recipe. I've used the 7 grain pilaf and the french lentils for a little variety. I've also switched the powdered mustard for ground coriander because we were out of mustard and I love the way coriander works with lemon.

Tuesday, August 15, 2006

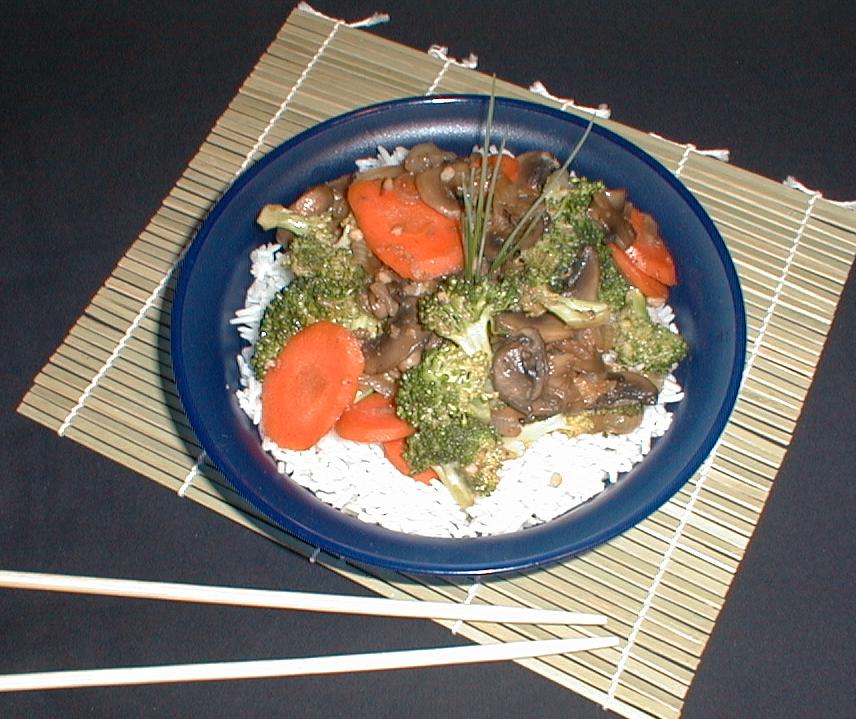
Basic Stir-Fry


1 carrot, thinly sliced on the diagonal
1 onion, cut into thin moons
12 oz fresh mushrooms, thinly sliced
1 crown broccoli cut into small florets
1-2 cloves garlic minced
1 T freshly ground ginger root
sushi vinegar
toasted sesame oil
hot oil
tamari


The keys to a good stir fry are fresh ingredients, prepping everything before the oil hits the wok, and only adding 1 ingredient at a time.


Heat the wok on high and add a small amount of a high heat tolerant oil like canola or peanut oil. Add the onion, breaking up the moons into strips. stir til coated with oil and starting to wilt. Add carrots and stir to coat with oil and if you like your carrots softer than crunchy, cover the wok with a lid to trap steam for 15-30 seconds. Uncover, stir and add the mushrooms, stir until mushrooms reduce in size and release liquid, then add the broccoli, stir, and cover again for a few seconds. Uncover, stir add garlic, ginger, and sushi vinegar, sesame oil, hot oil, hot oil and tamari to taste.

Monday, August 14, 2006

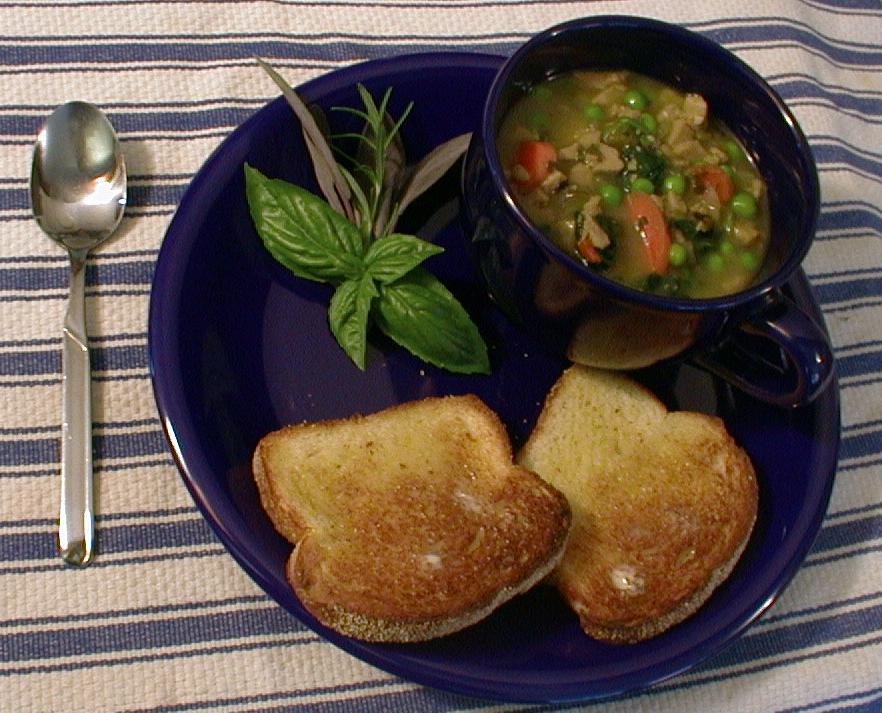
Seitan Pot Pie


1 chopped carrot
1-2 chopped celery stalks
1 chopped onion
1 package seitan w/broth
1 package Imagine No-Chicken Broth
1 cup frozen peas
1 cup frozen spinach
1 bay leaf
1 tsp fresh thyme
1 sprig fresh sage
1 sprig fresh rosemary
1 tsp fresh or dried oregano
1 T fresh basil
1-2 cloves garlic


Tonight's dinner was made in the slow cooker. I sauteed the onion, celery, and carrot in a skillet. I added these to the slow cooker along with the bay leaf, seitan (Whitewave Chicken-Style), the broth from the seitan and the box of Imagine No-Chicken Broth. Cooked on low for 6-8 hours, then 1 hour before serving, add the rest of the herbs, garlic, frozen peas, and spinach. Remove the bayleaf, rosemary and sage, and serve with a nice crusty bread. For a special occasion, cook in a dutch oven or casserole, top with biscuits and finish in the oven according to biscuit recipe.


This is one of Paul's favorite meals. It's usually the first thing that comes out of his mouth when I ask for menu suggestions. It's a great meal that we can agree on. I love soups and stews and Paul loves the texture of seitan. I remember hearing about seitan as a teenager and looking up a recipe for it on the internet, so the first time I ever had seitan was actually completely home-made by using bread flour and kneading the dough while rinsing away the starches. Today, most recipes for seitan skip the rinsing step altogether by starting with the dry gluten available from companies like Hodgson Mill. I still think that first time was far better than anything I've come up with since, but far more labor intensive. A far simpler solution is to buy pre-made seitan from a company like Whitewave. I can get my local health food store to order it for me by the case and it freezes beautifully in the sealed packaging without changing texture like tofu.